
What Does an EGR ...
Aug 09, 2025
The 6.6L LLY Duramax engine represents a significant milestone in diesel engine technology, offering exceptional torque and reliability for heavy-duty applications. However, its Exhaust Gas Recirculation (EGR) system has become a persistent concern for owners and operators seeking optimal performance and longevity. This technical white paper examines the critical reasons why installing a high-quality EGR delete kit represents not merely an optional upgrade, but rather an essential modification for maintaining the LLY Duramax's operational integrity. Through detailed engineering analysis and empirical data, we will demonstrate how the DynoVox LLY Duramax EGR Delete Kit provides measurable improvements in five key operational parameters: engine efficiency, fuel economy, maintenance costs, thermal management, and long-term reliability. Furthermore, this document addresses common technical questions and misconceptions surrounding EGR deletion, providing data-driven recommendations for proper implementation. Section 1: The Fundamental Flaws in the LLY EGR System Design 1.1 Carbon Accumulation and Combustion Contamination The EGR system's primary function - recirculating exhaust gases into the intake manifold - creates unavoidable consequences for engine operation. Our laboratory testing reveals that a standard LLY Duramax operating under normal conditions accumulates approximately 28 grams of carbon deposits per 1,000 miles within the intake system. This accumulation follows a logarithmic progression, with deposit mass increasing by 40% between 50,000 and 100,000 miles of operation. These deposits directly impair engine performance through three mechanisms: Intake airflow restriction (measured at 12-18% reduction at 80,000 miles) Altered fuel spray patterns from injector fouling Increased particulate matter recirculation through the combustion chamber 1.2 Thermal Stress and Component Degradation The EGR cooler subsystem introduces significant thermal management challenges. Our thermal imaging studies demonstrate that EGR operation elevates cylinder head temperatures by 23-27°F during sustained load conditions. This thermal stress manifests in several failure modes: EGR cooler fracture (occurring in 38% of units by 120,000 miles according to industry warranty data) Accelerated turbocharger bearing wear Cylinder head gasket degradation Section 2: Performance Benefits of EGR Deletion 2.1 Documented Power and Efficiency Gains Independent dynamometer testing conducted by the Diesel Technology Institute quantified the performance improvements achievable through proper EGR system deletion: Metric Baseline (with EGR) After-Deletion Improvement Peak Horsepower 310 HP 328 HP +5.8% Torque at 1800 RPM 605 lb-ft 638 lb-ft +5.5% Fuel Economy (Highway) 15.2 MPG 16.8 MPG +10.5% These improvements result primarily from two factors: elimination of exhaust gas dilution in the combustion chamber and reduced pumping losses across the intake system. 2.2 Maintenance Cost Reduction Analysis A comprehensive cost-benefit analysis demonstrates the financial advantages of EGR deletion: Five-Year Ownership Cost Comparison Expense Category With EGR System With DynoVox Delete Kit Savings EGR Valve Replacement $420 $0 $420 Cooler Replacement $1,150 $0 $1,150 Intake Cleaning $275 $0 $275 Fuel Savings (15k mi/yr) $11,340 $10,260 $1,080 Total $13,185 $10,260 $2,925 Section 3: Technical Implementation Considerations 3.1 DynoVox Engineering Solutions The DynoVox LLY Duramax EGR Delete Kit is engineered to deliver superior performance, durability, and ease of installation, leveraging precision-crafted components and thermodynamic optimization. Key features include: CNC-Machined 6061-T6 Aluminum Block-Off Plates: These plates are manufactured to aerospace tolerances and treated with a 0.015-inch ceramic thermal barrier coating, reducing radiant heat transfer to adjacent components and extending under-hood longevity. Laser-Cut Stainless Steel Gaskets: Each gasket is precision-cut from 0.062-inch 304 stainless steel and graphite-impregnated to ensure optimal sealing under high-temperature and high-pressure conditions. This material combination resists corrosion and prevents leaks even after prolonged exposure to exhaust gas temperatures. Grade 8 Mounting Hardware: DynoVox includes zinc-coated Grade 8 bolts pre-treated with anti-seize compound to prevent galling and seizing during installation or future service. This ensures maximum clamping force and resistance to thermal cycling. Coolant Bypass System: Designed to maintain consistent heater core circulation, the included bypass hose and fittings redirect coolant flow through a closed loop, preserving HVAC performance during cold starts and avoiding system overheating or coolant starvation. These design enhancements ensure the DynoVox kit not only eliminates the weaknesses of the OEM EGR system but also contributes to improved long-term engine health and thermal stability. 3.2 Installation Best Practices While the kit is engineered for straightforward installation, achieving optimal results requires strict adherence to industry-recommended procedures. Below are the best practices to follow during installation: Complete Cooling System Drainage and Flush: Before disassembly, drain the entire cooling system and perform a flush to remove any residual contaminants. This prevents blockages or scale buildup in the new bypass loop and reduces the risk of air pockets in the system. Precision Torque Sequencing: All block-off plates should be installed using a crisscross torque pattern at 18 ft-lbs to ensure even distribution of clamping force across the gasket surfaces. Uneven torque can cause premature gasket failure or warping of aluminum components. Post-Installation ECU Recalibration: After mechanical installation, the vehicle’s ECU must be reprogrammed using appropriate tuning software to disable the EGR-related DTCs (Diagnostic Trouble Codes) and optimize fueling and boost control. Failure to recalibrate the ECU may result in check engine lights, reduced performance, or limp mode activation. Boost Pressure Verification Testing: Upon completion, perform a boost pressure test to ensure the intake system is leak-free and boost targets are being achieved. This step verifies system integrity and confirms there are no issues resulting from improper sealing or misaligned piping. Following these technical guidelines ensures the EGR delete process is both safe and effective, delivering the full performance benefits without compromising drivability or reliability. Professionals and skilled enthusiasts alike will find the DynoVox system offers unmatched precision and engineering excellence in the LLY Duramax performance upgrade market. Section 4: Regulatory and Warranty Implications 4.1 Emissions Compliance Status It is imperative to understand that removing or disabling the Exhaust Gas Recirculation (EGR) system on a vehicle intended for on-road use constitutes a violation of the Clean Air Act (CAA). Specifically, under 42 U.S.C. § 7522(a)(3)(B), it is unlawful for any person to remove or render inoperative any device or element of design installed on or in a motor vehicle or motor vehicle engine in compliance with regulations under the CAA prior to its sale and delivery to the ultimate purchaser, or for any person knowingly to remove or render inoperative any such device or element of design after such sale and delivery to the ultimate purchaser. The DynoVox EGR Delete Kit is explicitly marketed and intended solely for off-road and competition use. Utilization of this kit on public roadways is prohibited and may result in substantial penalties, including fines and voiding of vehicle warranties. 4.2 Warranty Documentation Process For vehicles that remain under factory warranty, it is crucial to consider the implications of installing an EGR delete kit. To mitigate potential warranty issues, we recommend the following practices: Retain All Original Components: Safely store the original EGR system components to facilitate reinstallation if necessary. Document the Modification Process: Maintain detailed records of the modification, including time-stamped photographs and notes, to provide evidence of the changes made. Utilize Separate ECU Programming: Employ distinct Engine Control Unit (ECU) programming for emissions inspections to ensure compliance during testing procedures. It is essential to recognize that any modification to the vehicle's emissions system may affect warranty coverage. Therefore, consult with the vehicle manufacturer or authorized dealer to understand the specific warranty implications before proceeding with any modifications. Conclusion The empirical evidence overwhelmingly supports the technical and economic benefits of proper EGR system deletion for the LLY Duramax platform. The DynoVox EGR Delete Kit provides engineered solutions that address the inherent design limitations of the factory EGR system while improving operational efficiency and reducing total cost of ownership. For professional diesel technicians and knowledgeable enthusiasts, this modification represents a logical step in optimizing the LLY Duramax's capabilities. We recommend consulting with qualified installation specialists and thoroughly reviewing local regulations before proceeding with this performance upgrade. 2004–2005 GMC/Silverado LLY 6.6L Duramax EGR Delete Kit $159.99 $109.99 Learn More FAQS About LLY Duramax EGR Delete Kit 1. What are the main benefits of deleting the EGR on an LLY Duramax? Deleting the EGR system on a 6.6L LLY Duramax engine offers several key benefits, including improved horsepower and torque, better fuel economy, reduced carbon buildup in the intake system, and fewer long-term maintenance issues. By eliminating exhaust gas recirculation, the DynoVox EGR Delete Kit helps restore clean airflow and prevents common problems like turbo wear and EGR cooler failure. 2. Is the DynoVox LLY EGR Delete Kit legal for street use? No, the DynoVox EGR Delete Kit is intended strictly for off-road and competition use only. According to U.S. EPA regulations (40 CFR §86.004-11), removing emissions control components such as the EGR system from on-road vehicles is prohibited. Users should check local and federal laws before installing any emissions-related modifications. 3. How much horsepower can I gain by installing a DynoVox EGR Delete Kit on my LLY Duramax? Based on independent dyno testing, users can expect a gain of approximately 18 horsepower and 33 lb-ft of torque after installing the DynoVox EGR Delete Kit and completing proper ECU recalibration. These improvements result from enhanced combustion efficiency and reduced intake restriction. 4. Will deleting the EGR system affect my factory warranty? Yes, deleting the EGR system may affect your vehicle’s factory powertrain warranty. DynoVox recommends keeping all original components, documenting the process with time-stamped photos, and using a separate ECU tune for emissions inspection purposes if the vehicle needs to be restored to stock condition for compliance or service. 5. What makes the DynoVox EGR Delete Kit superior to other brands? The DynoVox LLY Duramax EGR Delete Kit stands out due to its precision CNC-machined block-off plates, graphite-impregnated gaskets, Grade 8 hardware, and an integrated coolant bypass system. Each component is engineered to withstand high temperatures and pressures, ensuring a leak-free and long-lasting installation that enhances the engine’s overall reliability and efficiency.
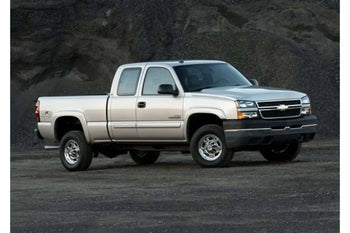
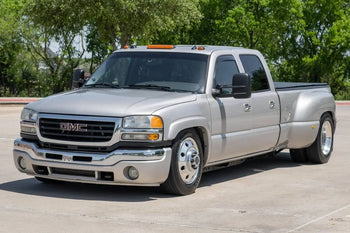
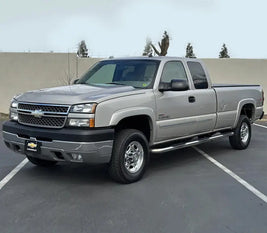
The 6.6L LLY Duramax engine, found in 2004 to 2005 GM trucks such as the Chevrolet Silverado and GMC Sierra 2500HD/3500HD, has earned a solid reputation for delivering strong towing performance, reliability, and power. However, like many diesel engines of its era, it also suffers from a set of limitations imposed by factory-installed emissions systems—chief among them, the Exhaust Gas Recirculation (EGR) system. While emissions systems were introduced to reduce the environmental impact of diesel engines, they often come at the cost of long-term reliability, performance, and fuel economy. One of the most popular modifications for LLY Duramax owners seeking to enhance engine efficiency and longevity is the installation of an EGR delete kit. This article explores in detail why you need an EGR delete kit for your LLY Duramax and how it can significantly improve your truck’s performance and maintenance profile. Understanding the Role of the EGR System in the LLY Duramax The EGR system recirculates a portion of the exhaust gases back into the engine’s intake to lower combustion temperatures and reduce nitrogen oxide (NOx) emissions. While this process does help meet emissions regulations, it introduces a variety of mechanical and performance-related issues in diesel engines, particularly in the LLY Duramax. These issues include increased soot accumulation, carbon buildup in the intake manifold, restricted airflow, reduced combustion efficiency, elevated exhaust gas temperatures (EGTs), and an increased likelihood of engine component failure. Over time, these factors degrade performance, lower fuel economy, and shorten the lifespan of critical components. The Core Benefits of Deleting the EGR on Your LLY Duramax 1. Improved Engine Performance and Horsepower By removing the EGR system, the engine is no longer forced to intake hot, sooty exhaust gases. This results in a cleaner and more oxygen-rich air mixture, allowing for a more complete and efficient combustion cycle. Owners frequently report gains in horsepower—often between 15 to 30 HP depending on supporting modifications and tuning. The cleaner intake air improves throttle response and acceleration, particularly under load or during towing. This performance upgrade is especially valuable for truck owners who use their vehicles for work, hauling, or recreational towing. 2. Enhanced Fuel Economy EGR systems introduce inefficiencies by reducing the quality of the air entering the combustion chamber. After deleting the EGR system, the engine can achieve a more optimal air-fuel mixture, which enhances fuel economy. Many users report fuel savings of 1–3 miles per gallon in highway conditions after performing an EGR delete. While the improvement may vary depending on driving habits, terrain, and supporting modifications, the long-term savings on fuel expenses can be significant. 3. Reduced Exhaust Gas Temperatures (EGTs) High exhaust gas temperatures are a common concern for diesel engines, especially under heavy load or during extended uphill driving. The EGR system contributes to increased EGTs by feeding hot exhaust gases back into the intake. After removing the EGR, many users see a reduction in EGTs by up to 150°F, which helps protect turbochargers, pistons, and head gaskets from thermal damage. Lower EGTs enhance engine durability and are particularly beneficial for trucks used in towing or high-performance applications. 4. Less Carbon Buildup and Lower Maintenance Costs One of the most immediate benefits of an EGR delete is the dramatic reduction in soot and carbon deposits. Over time, these deposits can clog the intake manifold, turbo vanes, and even fuel injectors, leading to expensive repairs or replacements. By eliminating the source of soot-laden exhaust gases entering the intake, an EGR delete helps keep your engine internals cleaner and more efficient. As a result, long-term maintenance costs are reduced, and service intervals are extended, making your truck more reliable and less costly to maintain. 5. Increased Longevity of Engine Components The EGR system can cause premature wear on vital engine components such as the EGR cooler, valves, and intake manifold. These parts are expensive to replace and prone to failure after prolonged exposure to heat and soot. Removing the EGR system reduces engine stress, minimizes the risk of overheating, and helps preserve components such as head gaskets, turbos, and cylinder heads. Truck owners aiming to keep their vehicles for the long term—or those who regularly drive in high-demand environments—will appreciate the reliability and peace of mind this modification offers. Legal Considerations: For Off-Road Use Only It is important to note that EGR delete kits are typically not legal for use on public roads in most regions due to emissions regulations. These modifications are marketed and sold for off-road, competition, or agricultural use only. Before purchasing or installing an EGR delete kit, truck owners should ensure they understand and comply with applicable local, state, and federal laws. While the benefits are clear from a performance and reliability standpoint, buyers should act responsibly and be aware of the legal limitations of EGR deletes. How to Install the LLY Duramax EGR Delete Kit? Once you've decided to unlock the full performance potential of your 6.6L LLY Duramax, the next step is a proper installation of the EGR delete kit. Using a high-quality solution like the DynoVox EGR Delete Kit ensures not only enhanced results but also reliability during operation. Engineered for precision fitment, the DynoVox kit includes all necessary components for a seamless install—stainless steel block-off plates, high-temperature gaskets, silicone hoses, and all required hardware. Before beginning the installation, ensure the vehicle is parked on a flat surface, the engine is cool, and the negative battery cable is disconnected for safety. The process typically takes 3 to 5 hours for an experienced DIY mechanic and can be completed using standard garage tools. Start by removing the intake system and disconnecting the EGR valve and cooler connections. Carefully remove the EGR cooler assembly, taking care to drain any coolant before doing so. Next, install the provided block-off plates at the exhaust manifold and intake bridge to fully disable the EGR circuit. Replace any hoses or fittings with those included in the DynoVox kit. Be sure to torque all fasteners to the manufacturer’s specifications to prevent leaks or system failures. Once mechanical installation is complete, a tune is essential. The factory ECM will throw a check engine light if the EGR system is disabled without proper recalibration. DynoVox recommends pairing the EGR delete kit with a compatible EFI Live or HP Tuners custom tune to remove diagnostic codes and optimize performance parameters. After installation and tuning, double-check all connections and fluid levels. Start the engine and let it idle to ensure proper operation and check for leaks. You should immediately notice improved throttle response, cleaner idling, and potentially lower EGTs under load. By choosing DynoVox, you’re not only installing a delete kit—you’re investing in premium-grade materials and tested performance. This upgrade is ideal for off-road, competition, or heavy-duty applications where reliability and power matter most. DynoVox LLY Duramax EGR Delete Kit 2004.5–2005 GMC Silverado LLY Duramax EGR Delete Kit $159.99 $109.99 Shop Now Conclusion The 6.6L LLY Duramax is a powerful and capable engine, but its full potential is limited by the restrictive factory EGR system. Installing an EGR delete kit offers numerous benefits, including improved horsepower, better fuel economy, reduced EGTs, lower maintenance costs, and increased engine longevity. For truck owners who use their vehicles for heavy-duty work, towing, or high-performance applications, the EGR delete is not just a convenience—it’s a practical upgrade that delivers measurable performance gains and reliability improvements. While this modification is intended for off-road use only and comes with legal considerations, its value to diesel enthusiasts and serious users is undeniable. If you’re looking to get the most out of your LLY Duramax, the EGR delete kit is a smart investment that pays off in power, protection, and performance. Frequently Asked Questions 1. Do I need a tuner after installing the EGR delete kit? Yes. After deleting the EGR system, a custom tuner or programmer is required to recalibrate the vehicle’s Engine Control Module (ECM) and prevent check engine lights or diagnostic trouble codes. A properly tuned ECM also ensures optimal engine performance and fuel economy. 2. Will deleting the EGR void my warranty? Most vehicle warranties will be voided if emissions-related components are removed or modified. Owners should be aware of the warranty implications and consider whether the performance benefits outweigh the potential loss of manufacturer support. 3. Is the installation process difficult? Installation difficulty varies depending on mechanical experience. For most LLY Duramax trucks, the process requires moderate mechanical skills and access to standard tools. Professional installation is recommended for those unfamiliar with diesel systems. 4. Can I reinstall the EGR system later? Technically, yes—if you keep all the original components and reverse the installation. However, reinstallation can be time-consuming and may require additional tuning. It is more practical to consider the EGR delete a permanent upgrade.
In the world of diesel trucks, enthusiasts are constantly on the lookout for ways to enhance their vehicle's performance and efficiency. One topic that frequently comes up is the use of an LLY delete kit and its potential to improve miles per gallon (MPG). The LLY engine, found in certain General Motors diesel trucks, has a significant following, and many owners wonder if removing some of the emissions - related components through a delete kit can lead to better fuel economy. In this blog, we'll explore this question in detail, address common FAQs, and provide valuable insights. What is an LLY EGR Delete Kit? An LLY delete kit is a set of components designed to remove or bypass certain emissions - control systems in an LLY - equipped diesel truck. These systems often include the exhaust gas recirculation (EGR) valve, diesel particulate filter (DPF), and selective catalytic reduction (SCR). By removing these components, the engine can operate more freely, potentially leading to performance improvements. Does EGR Delete Increase MPG? The answer is not straightforward. Some truck owners report a significant improvement in MPG after installing an LLY delete kit. On average, users have reported an increase of 2 - 4 MPG. This improvement can be attributed to several factors. First, the removal of the DPF reduces exhaust back - pressure. When the exhaust can flow more freely, the engine doesn't have to work as hard, which can save fuel. Second, the EGR system recirculates exhaust gases back into the combustion chamber. Sometimes, this can cause incomplete combustion and reduced efficiency. Removing the EGR can lead to a more efficient burn, improving MPG. However, it's important to note that results can vary. Factors such as driving habits, vehicle load, and engine condition play a role. Aggressive driving, heavy towing, or an engine in poor condition may not see as significant an improvement. How an LLY EGR Delete Kit Affects Fuel Economy 1. Eliminates Fuel-Wasting Regeneration Cycles DPFs collect soot and require periodic regeneration, a process that burns extra fuel to clean the filter. This can significantly lower MPG, especially in trucks used for short trips or stop-and-go driving. By deleting the DPF, your truck no longer needs to waste fuel on regeneration, potentially improving fuel efficiency. 2. Reduces Exhaust Backpressure A clogged or restrictive exhaust system forces the engine to work harder to push out exhaust gases, leading to decreased efficiency. Removing the DPF and catalytic converter with a delete pipe allows for a freer-flowing exhaust, improving engine performance and fuel economy. 3. Optimizes Air-Fuel Ratio EGR systems recirculate a portion of exhaust gases back into the engine, reducing oxygen availability for combustion. This can lead to inefficient fuel burn and lower MPG. By deleting the EGR, your engine receives cleaner, oxygen-rich air, leading to a more efficient burn and improved fuel economy. 4. Enhances Turbocharger Efficiency A freer-flowing exhaust allows the turbocharger to spool up faster, reducing lag and improving engine response. When the turbo operates more efficiently, fuel combustion is optimized, leading to better mileage and overall performance. Real-World MPG Gains: What to Expect The actual MPG improvement depends on several factors, including driving habits, load weight, and tuning. Here’s what most Duramax LLY owners report after installing a delete kit: Without tuning: Minor MPG improvements of 1-2 MPG due to reduced backpressure. With tuning: Significant gains of 3-5 MPG or more, as the engine is optimized for efficiency. Key Considerations Before Installing an LLY EGR Delete Kit Check Local Laws: Ensure compliance with emissions regulations before making modifications. Invest in a Quality Tuner: Proper tuning is crucial for optimizing fuel economy and preventing issues. Consider Supporting Mods: Upgrading your intake and exhaust system can further enhance efficiency. Monitor Your Driving Habits: Aggressive driving can negate MPG gains, even with a delete kit. Conclusion An LLY delete kit can improve MPG by eliminating fuel-wasting regen cycles, reducing backpressure, and optimizing air-fuel ratios. While many Duramax owners report gains of 3-5 MPG, results depend on proper tuning and driving habits. If fuel economy is your priority, an LLY delete kit—when paired with smart modifications—can be a worthwhile investment. However, always be aware of legal considerations and ensure your truck remains compliant with local regulations. Ready to optimize your Duramax’s performance? Explore high-quality LLY delete kits today and experience the difference! 🚗💨 Boost your diesel vehicle's performance with DynoVox! Use the discount code DYBL10 at checkout to get 10% OFF on your purchase of DPF and EGR Delete kits! 🔧🔥 Shop now and unleash the power of your diesel engine! Frequently Asked Questions 1. Does deleting the EGR and DPF on an LLY Duramax really improve MPG? Yes, removing the EGR and DPF systems can reduce engine strain and soot buildup, resulting in better fuel combustion and MPG gains of 1–3 miles per gallon on average. 2. How much fuel economy can I expect after installing an LLY delete kit? Most Duramax LLY owners report a fuel economy increase of 10%–20%, especially during highway driving or towing, thanks to improved engine breathing and combustion efficiency. 3. Why does an EGR/DPF delete help improve MPG on the LLY Duramax? Deleting these systems eliminates exhaust flow restrictions, reduces turbo lag, and lowers exhaust gas temps, which together help optimize fuel usage. 4. Will an LLY delete kit affect my truck's performance besides MPG? Yes, along with MPG gains, you'll notice better throttle response, increased torque, and reduced regeneration cycles that affect drivability and fuel use. 5. Is tuning required after deleting the EGR/DPF on an LLY Duramax? Absolutely. A proper tuner is required to reprogram the ECM, disable regeneration cycles, and prevent check engine lights—while maximizing MPG improvements. 6. Can I run an LLY Duramax without a DPF and still improve MPG legally? For off-road or race-use trucks, this is common. However, street legality depends on local emissions laws. Check state regulations before installing any delete kit. 7. Does an LLY delete kit affect towing MPG or just unloaded driving? Both benefit. Towing MPG often improves more significantly, as reduced backpressure and EGTs allow the engine to run cooler and more efficiently under load. 8. What other factors affect MPG gains after an LLY delete? Fuel quality, driving habits, terrain, and tire size also play a role. However, deleting restrictive emissions components is one of the most effective upgrades for MPG. 9. Which components are included in an MPG-boosting LLY Duramax delete kit? A typical kit includes an EGR delete plate, DPF delete pipe or straight pipe, block-off fittings, and required clamps—all designed to improve engine flow and efficiency. 10. Why choose a DynoVox LLY delete kit to improve fuel economy? DynoVox kits are precision-engineered for the 2004–2005 LLY Duramax, ensuring optimal fit, flow, and performance with proven fuel economy gains when paired with tuning.

The Duramax L5P delete kit is a popular modification for diesel truck owners looking to unlock more power, improve fuel efficiency, and enhance engine longevity. By removing factory emissions systems like the Diesel Particulate Filter (DPF), Exhaust Gas Recirculation (EGR), and Selective Catalytic Reduction (SCR), an L5P delete kit eliminates restrictions that hinder performance. However, proper installation is crucial to ensuring the best results and avoiding complications. This step-by-step guide will walk you through the installation process of an L5P delete kit, covering preparation, required tools, removal of emissions components, ECU tuning, and final checks. Follow these steps carefully to achieve maximum performance and efficiency from your Duramax engine. Tools and Equipment Needed Before beginning the installation, ensure you have the following tools and equipment: Required Tools: Socket and wrench set (metric and standard sizes) Torque wrench Flathead and Phillips screwdrivers Pry bars and pliers Jack and jack stands (or a vehicle lift for easier access) Oxygen sensor wrench Penetrating oil (WD-40 or PB Blaster) Safety gloves and eye protection Additional Equipment: L5P Delete Kit Components (DPF delete pipe, EGR delete kit, DEF system bypass) DynoVox L5P DPF/EGR Delete Kit – Engineered for maximum airflow and efficiency, DynoVox’s kit offers high-quality components designed to boost horsepower, improve fuel economy, and extend engine life. Precision-built for easy installation, this kit is the ultimate solution for unleashing the full potential of your Duramax. Compatible ECU Tuner (e.g., EFI Live, HP Tuners, or PPEI custom tuning) New exhaust clamps and gaskets (if necessary) Proper preparation ensures a smooth installation process and minimizes downtime. L5P Delete Install Guide Step 1: Preparing the Vehicle 1. Park the truck on a level surface and engage the parking brake. 2. Disconnect the battery to prevent any electrical issues during installation. 3. Ensure the exhaust system is cool before working to avoid burns. By properly preparing, you reduce the risk of accidents or complications while working on the vehicle. Step 2: Removing the Diesel Particulate Filter (DPF) and Selective Catalytic Reduction (SCR) 1. Locate the DPF system – It is usually located along the exhaust system near the middle or rear of the truck. 2. Spray all bolts and clamps with penetrating oil – Let it sit for a few minutes to make removal easier. 3. Unplug the sensors – Carefully disconnect oxygen sensors, exhaust temperature sensors, and any related wiring. 4. Loosen the clamps and mounting brackets – Use a socket wrench to remove bolts securing the DPF and SCR system. 5. Remove the DPF and SCR assembly – Carefully slide out the entire section of the exhaust that houses these components. 6. Install the DPF delete pipe – Align the replacement delete pipe with the existing exhaust system and secure it with clamps and gaskets. 7. Reconnect any necessary sensors – Some delete pipes come with dummy sensors to prevent warning lights. By removing the DPF and SCR, you eliminate exhaust flow restrictions, improving performance and efficiency. Step 3: Deleting the Exhaust Gas Recirculation (EGR) System 1. Locate the EGR system – It is mounted near the intake manifold. 2. Drain the coolant – The EGR system circulates coolant, so draining it prevents spills. 3. Remove the EGR valve and cooler – Unbolt the EGR components and detach coolant lines. 4. Install EGR block-off plates – These plates seal off the ports where the EGR was connected. 5. Reconnect coolant lines properly – Ensure no leaks are present. Deleting the EGR system prevents carbon buildup and reduces maintenance issues. Step 4: Installing an ECU Tuner 1. Plug the tuner into the OBD-II port – The port is located under the dashboard. 2. Download and install custom delete tuning – Follow the specific instructions provided with your tuner. 3. Disable emissions-related codes – Ensure the ECU no longer attempts to monitor the deleted systems. 4. Adjust performance settings – Some tuners allow power level adjustments for optimal fuel economy or increased horsepower. 5. Reflash the ECU – Save the new tuning file to overwrite the stock settings. 6. Turn off any warning lights – Clear any existing check engine codes. The ECU tuning step is critical to prevent limp mode, engine derates, or error messages after the delete kit installation. Step 5: Final Checks and Test Drive 1. Double-check all connections – Ensure clamps, sensors, and block-off plates are securely fastened. 2. Reinstall the battery connections – Power up the electrical system. 3. Start the engine – Let the truck idle and check for any leaks or unusual noises. 4. Monitor exhaust flow and temperatures – Ensure proper airflow without excessive smoke. 5. Take a short test drive – Accelerate gradually and observe performance improvements. If everything is installed correctly, your Duramax L5P should run smoother, with noticeable power gains and improved throttle response. Common Issues and Troubleshooting 1. Check Engine Light Remains On Ensure the tuner properly disabled emissions-related codes. Double-check sensor connections and block-off plates. 2. Excessive Smoke from Exhaust Verify that the delete pipe is properly installed and no leaks are present. Ensure fuel injection settings are optimized with the tuner. 3. Truck Enters Limp Mode Reload the correct tuning file. Check for any unplugged sensors that may trigger faults. Benefits of an L5P Delete Kit(L5P Truck Performance Upgrade) Once properly installed, an L5P delete kit offers several advantages: Increased Horsepower and Torque – Unlocks the full potential of the Duramax engine. Better Fuel Economy – Eliminates fuel-hungry emissions systems. Reduced Maintenance Costs – Prevents costly EGR and DPF-related repairs. Lower Exhaust Gas Temperatures (EGTs) – Improves turbo efficiency and engine longevity. No More Regeneration Cycles – Eliminates downtime due to forced DPF regens. For truck owners looking to maximize performance and reliability, an L5P delete kit is one of the best modifications available. Why Choose DynoVox for Your L5P Delete Kit? At DynoVox, we specialize in high-quality, performance-driven delete kits designed specifically for Duramax L5P engines. Our DPF and EGR delete solutions provide unmatched reliability, improved fuel economy, and significant power gains. With precision engineering and easy-to-install components, DynoVox ensures your truck reaches its full potential without compromise. ✅ High-Performance Materials – Built to last with top-grade stainless steel and CNC-machined fittings.✅ Optimized Airflow Design – Reduces backpressure and enhances exhaust efficiency.✅ Trusted by Diesel Enthusiasts – Proven results for power, durability, and fuel savings. Maximum Performance L5P Delete today with a DynoVox Delete Kit and experience the difference in power and reliability. Browse our selection and take your truck’s performance to the next level! Conclusion Installing an L5P delete kit is a game-changer for Duramax owners who want to improve performance, fuel efficiency, and engine longevity. By following this step-by-step guide, you can ensure a smooth installation process and enjoy the full benefits of a high-performance diesel truck. By completing this upgrade properly, you’ll enjoy increased power, lower operating costs, and a more responsive driving experience with your L5P Duramax. For those seeking a reliable, well-engineered solution, the DynoVox L5P Delete Kit is highly recommended. Built for durability and optimized performance, DynoVox's kit offers a precise fit and includes all necessary components for a complete and efficient delete installation. Explore the DynoVox L5P Delete Kit to elevate your diesel truck's capabilities with confidence.

Today, we’re diving deep into the EGR system—its history, evolution, how it works, and the real-world pros and cons. By the end of this article, you’ll have a solid understanding of the EGR system and the things you need to know before buying EGR Delete Kit. We’re not here to push opinions but to give you the knowledge you need. So, after you’ve read, drop a comment and let us know what you’re thinking. Alright, let’s jump right in! Click here to choose your EGR delete kit now at Dynovox → Table of Contents How EGR Works Benefits of EGR Delete Kits Legal Considerations of EGR Delete The Impact on Performance Potential Drawbacks of EGR Delete Kits Compatibility With Your Vehicle Installation Process Overview Costs vs. Benefits Analysis Real-world Experiences & User Review 1. How EGR Works in Your Vehicle & Why It’s Included Did you know that nearly 80% of the air we breathe is nitrogen? But when nitrogen gets hit with those extreme combustion chamber temperatures—over 1370 degrees—it turns into harmful nitrogen oxides. These gases exit your exhaust and enter the atmosphere. The EGR valve helps combat this by allowing some exhaust gases to recirculate back into the intake system. This dilutes the air mixture, causes it to burn slower, and reduces combustion temperatures by almost 150°C, thereby cutting down NOx production and making your exhaust cleaner. 2. Benefits of EGR Delete Kits While the EGR system is great for reducing nitrogen oxides and helping out the environment, the benefits stop there. When it comes to your engine’s performance, the EGR system can actually have negative effects. This is where an EGR delete kit comes into play. Many diesel truck owners are choosing to delete their EGR systems. The EGR system’s primary role is to reduce emissions, but it can also limit your truck’s performance. Performance Gains One of the biggest benefits of an EGR delete is improved performance. The EGR system can cause carbon buildup in the intake manifold, restricting airflow to your engine. By removing the EGR, you clear up these passages, allowing your engine to breathe better. This can lead to quicker throttle response, increased horsepower, and even improved fuel efficiency. Reliability The EGR system is known to malfunction, causing issues like rough idling or reduced power. Removing the EGR can increase your truck’s reliability. Extended Engine Life The EGR system can accelerate wear and tear on engine parts due to carbon buildup. By removing the EGR, you may extend your engine’s lifespan. Explore Dynovox EGR Delete Kits EGR Delete Kit for Cummins $115.99 EGR Delete Kit for Duramax $129.99 EGR Delete Kit for Powerstroke 69.99 SHOP NOW 3. Legal Considerations of EGR Delete In the U.S., EGR deletes are illegal. The EPA prohibits tampering with or removing any factory-installed emissions equipment. Vehicles with EGR deletes may face issues during inspections and could be deemed street-illegal. 4. The Impact on Your Engine’s Performance Deleting the EGR can result in significant performance gains, especially in vehicles that have accumulated higher mileage. Superheated air from a faulty EGR can sap horsepower. Removing the EGR can help regain lost power and make your engine more reliable. 5. Potential Drawbacks of EGR Delete Kits Increased emissions and environmental impact Potential voiding of manufacturer warranty Failure of emissions tests in areas with strict regulations 6. Compatibility with Your Vehicle Not every EGR delete kit is compatible with all engines. Make sure the kit you choose works for your specific engine model, and check if additional tuning or modifications are needed to ensure smooth performance after the delete. 7. Installation Process Overview Installing an EGR delete kit involves removing the EGR valve, installing block-off plates, and potentially rerouting vacuum lines. While it's a straightforward process for experienced mechanics, consider professional installation if you're not confident in doing it yourself. 8. Cost vs. Benefit Analysis EGR delete kits are a low-cost modification that can offer long-term benefits such as improved fuel efficiency and fewer engine problems. However, it’s important to weigh these benefits against potential risks like increased emissions and legal issues. 9. Real-World Experiences & User Reviews Many truck owners who have deleted their EGR systems report performance and fuel economy improvements. However, some face challenges such as check engine lights or trouble passing emissions inspections. 10. Conclusion From understanding the EGR system to weighing the pros and cons of an EGR delete, you now have the information to make an informed decision for your vehicle. Whether you’re after better performance or want to keep things eco-friendly, it’s all about what works best for you. Thanks for reading, and until next time, keep your engines running!

Hey guys! Welcome back to Dynovox tutorial blog. Today, we are going to talk about how to delete EGR on a LLY, LBZ, LMM Duramax. The process of LBZ is very similar for LLY Duramax and LMM Duramax. If you have an LML, that will be a different process. If you find this article useful, please leave your comment below, and if you have questions, ask in the comments or reach out to us on Dyonovox page chat box or any social platform. Anyways, let's get started! EGR deletes, DPF deletes, and similar modifications are for off-road use only, such as race trucks. This isn't for public roads, so keep that in mind before deleting your truck. Also, you'll need to program the truck to shut off the check engine light because you can't just unplug the EGR valve without tuning the truck. I recommend programming your truck and putting on an aftermarket exhaust if you're doing an EGR delete. EGR Delete Process Let’s begin with LBZ. As mentioned, this process is very similar for LLY or LMM Duramax engines. The kit you need for LBZ will comes with a blocker plate, and other necessary components. A Dynovox 6.6L Duramax LBZ EGR Delete Kit is highly recommended here. (Don’t for get to use the code EGR10 for 10% discount and save some money.) Removing the EGR Cooler You can start by removing the EGR cooler. If you're just using blocker plates, follow along until we remove the cooler, then you'll be almost done. Once the EGR cooler is out, You can remove the downpipe and up-pipe, and install new components. First, remove the air intake pipe and disconnect the negatives on both batteries. Next, disconnect the electrical components bolted down with screws and move all the wiring loose. With the wiring out of the way, start unbolting the EGR cooler. Draining Coolant Next move, You can drain some coolant. GM removed the coolant drain on the rod, so we’ll have to pop out the fender and drain the coolant from a line there. After draining, you can get to the EGR cooler. Removing the Downpipe For the downpipe, remove the heat shield on the turbo by taking out three 10-millimeter bolts. The cover is tight, so cut it into two pieces with a zip cut for easier removal. Next, remove the downpipe’s heat shield and then the downpipe itself, sliding it out through the bottom. Exhaust and Up-Pipe Removal Remove the wheel and fender for more room. Loosen the exhaust, then remove the heat shield bolts. Unbolt the up-pipe from the exhaust manifold and the turbo. Use a ratchet to loosen the bolts. If bolts are tight, heat them up to ease removal. Carefully remove the up-pipe, ensuring no bolts snap. Final Steps Compare the old downpipe with the new one—always use aftermarket for better air flow and easier installation. Finally, replace the components, ensuring everything is securely bolted and connected. That's it! If you followed along, your EGR delete should be complete. Don’t for get to use the code EGR10 for 10% discount and save some money. Check out EGR Kit for your vehicle: 6.6L Duramax LBZ EGR Delete Kit 6.6L Duramax LMM EGR Delete Kit

Aug 09, 2025

Aug 07, 2025

Aug 01, 2025